Our project is officially underway with a great team of photographers out scouring the hills and dales of Hunterdon County getting great shots.
The objective of the project is two fold. One is to generate a large body of work by a diverse group of photographers that documents and expresses the built environment of Hunterdon. The other objective is that each photographer enjoys the process of getting out, exploring, finding stuff to shoot and producing images of what they saw.
The name of the project is probably a little redundant. Barns are buildings, of course, but “Barns, Bridges and Buildings” is more fun to say than Bridges and Buildings.
It should be noted that this is not a contest. It’s a project. There are no winners or losers. Every photo submitted becomes part of the archive which will be shared with the Hunterdon Historical Society and will be featured in an online gallery.
While there aren’t any winners, outstanding photographs will be recognized and the photos published in the Hunterdon County Chamber of Commerce magazine, “Hunterdon Living.” The top photographers will also be profiled in the magazine. Depending on what happens with the pandemic, an exhibition may also be mounted.
On top of all this an eBook is planned that will contain the best photographs.
PARAMETERS FOR PROJECT PHOTOGRAPHERS
Only photographers who registered before July 15th are eligible to submit photos. The list of photographers is final.
The project parameters are pretty simple. Photos must be taken within Hunterdon County during the summer of 2020 and the primary subject of the photos should be a bridge or a building. Buildings can be old or new, houses, commercial buildings, churches, institutions, etc. Photos of abandoned or dilapidated buildings are discouraged and won’t be used for publication.
Photos can be taken with any kind of camera, including cell phones, but it is important (imperative!) that the file names of the photos submitted follow strict guidelines.
Files must use this naming convention: “photographers name – location“. Do not use ALL UPPER CASE. Here is an example:
Robert Jones-Stone Bridge, Water Street, Tewksbury.jpg.
Simple, right?
You can take photos anytime, day or night of any building or bridge, but don’t trespass. If you can see a building from a public road, it is fair game. Just be careful about people. They can be in your photos but if they are recognizable or on private property you need their permission and a model release.
Photos that are submitted should also be geotagged and keyworded. This isn’t a make or break requirement but adds a valuable dimension to your photography. Here is a short video that shows how to geotag your photos GEOTAG YOUR PHOTOS. It only takes a couple of minutes to keyword and geotag your photos and will be looked on very favorably.
PLANNING
Before heading out to shoot, it’s always a good idea to have a plan. You could just wander around aimlessly which is fun, but thinking ahead can save you a lot of time and enable you to find things you might otherwise miss.
There are a ton of sites that list historic buildings as well as bridges. All ya gotta do is Google. A couple of sites you might want to check out are :
Bridge Hunter
National Register of Historic Places
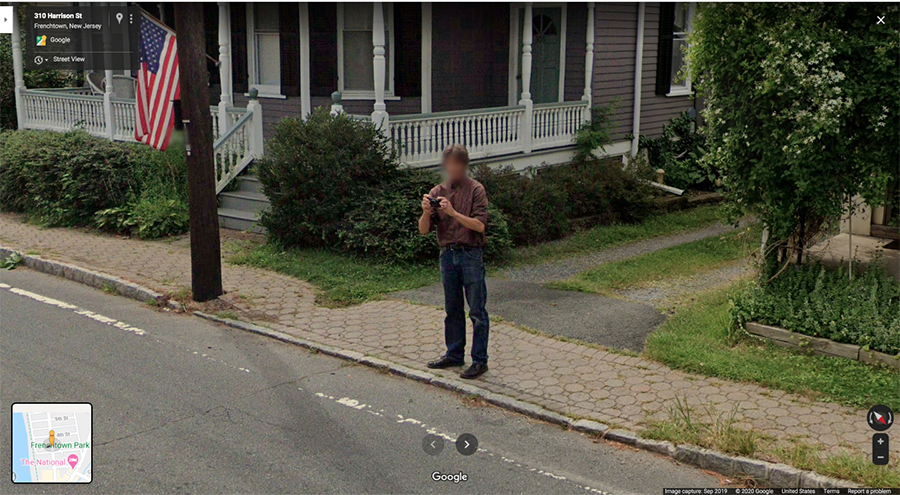
Naturally you will want to use Google Map to help find your way around. The satellite view is great for seeing what conditions you can expect and Street View is invaluable for seeing exactly what can be seen from the street.
If you’ve never used Street View is is worth trying out. All you have to do is to zoom into the area you want to check out and then pick up Pegman (the little yellow guy at the bottom right corner of the map and drop him where you want to look around. If the roads on the map turn blue when you grab Pegman you will be able to see a 360 degree street level view of the area.

One day I saw the Google Street View drive by my studio in Frenchtown and ran out to get a picture of it. I missed the shot ( I don’t remember why) but it got me!
It is good to know what to expect in terms of the weather and where the sun and moon will be.
A lot of people like to use The Weather Channel for their weather info which is fine. I like to go right to the source and use the National Weather Service websites. Here are two links. The first is an interactive map and the second is the NWS forecast.
NWS WEATHER AND HAZARDS DATA VIEWER
One of my favorites sites to visit when planning a shoot is The Photographers Ephemeris: www.photoephemeris.com/tpe-for-desktop. This app will show the direction of the sun and moon, anywhere, anytime. The desktop app is free and the mobile app is only a few bucks. Definitely worth checking out.
You might also consider teaming up with other project photographers to share tips before hitting the road. Here is the list of photographers who’ve signed up to make this a glorious and awe-inspiring project. PROJECT PHOTOGRAPHERS. Check it out. You might see folks you know. Also be sure to take advantage of our FACEBOOK GROUP where you can see what other folks are doing and share your stories and photos.
SHOOTING
Once you’ve figured out your plan then it’s time to hit the road. Naturally, you’ll want to charge up your batteries and do all the other photographer stuff. As seasoned shooters you know what to do. But there are a few things you might want to take note of.
First of all I strongly recommend wearing long pants, shoes and socks. Chances are you’ll be walking in the weeds at times to get a good shot and there are plenty of things out there that can make your life unpleasant if you aren’t aware.
We all know that ticks and chiggers love to suck our blood and pass on happy little parasites that can cause diseases and infections. Wearing proper clothing will reduce your chance of being bitten. It’s also a good idea to spray your pants and shoes with nasty chemicals to repel our blood sucking friends. Permethrin is recommended for spraying on clothing and does a great job. Just don’t spray it on your skin or in your face. (It’s strong stuff).
Insect repellents containing DEET are also a good idea. DEET is also kinda nasty but is considered safe for applying to your skin. Products like Off and Cutters contain DEET. Go for stronger stuff and use it liberally. While you may not like using chemicals, I can assure you that you will enjoy Lyme disease even less.
There are also some rather brutal plants plants growing in this region that you should definitely be aware of. Poison ivy is always to be avoided. Most of us grew up with it so we should know what it looks like to avoid it. If you do brush up against it with bare skin, grab your alcohol-based hand sanitizer immediately and wash off the area, then wash off the alcohol. You might want to consider bringing extra water and soap just in case. This will reduce your chance of getting a rash.
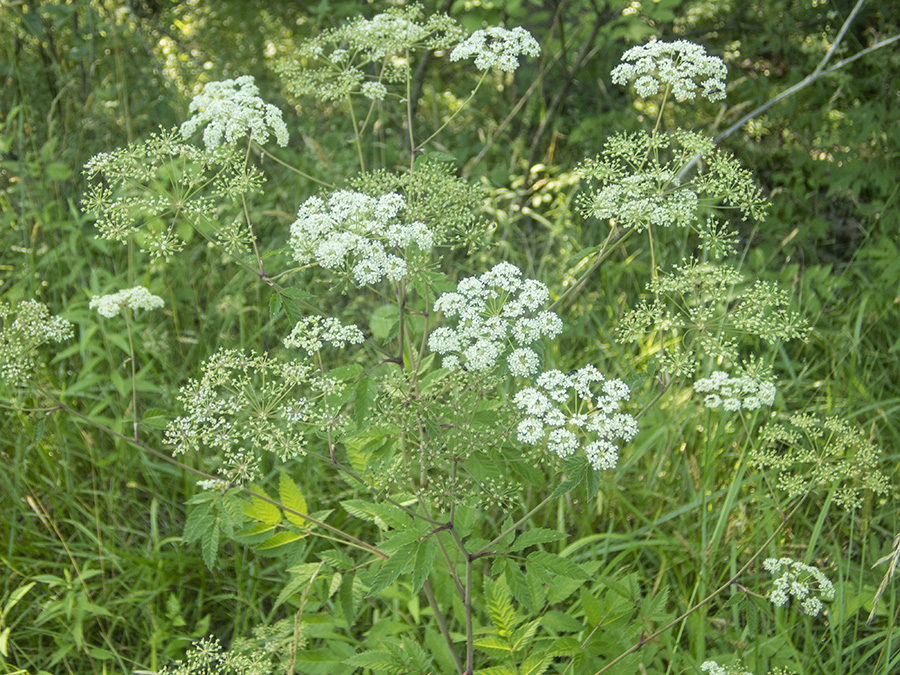
While poison ivy is a menace to those who are sensitive, it is positively mild compared to some recent invaders, notably hogweed, wild parsnip and hemlock. Brushing up hogweed or wild parsnip can cause very serious burns and blisters. Hemlock is famously very poisonous and should by all means be avoided.
They are all members of the parsnip family and have flowers that are similar to queen anne’s lace. Hogweed has a giant flower and huge leaves. Wild parsnip has yellow flowers and hemlock has greenish flowers this time of year.
Here is a website with some photos.
Giant Hogweed and Common Lookalikes
I haven’t seen hogweed and am not sure if I’ve seen wild parsnip but I’ve encountered hemlock. There is a big patch of it growing along the road near my house. The flowers have turned from white to green and it blends in with the other vegetation.
Safety always matters. No one wants to get sick or get hurt.
On the photography side of things you’ll want to keep track of what you are shooting. In addition to taking photos of your subjects also take photos of things that will help you remember where they are. Photos of things like mailboxes and road signs will help you identify locations later.
A notebook is also a good idea.
Another great practice is to use Google Map on your cell phone and “drop a pin” when you stop to take photos. It isn’t hard. You just put your finger on the map and hold there for a few moments. A red paddle will pop up, then you can share the save the location and refer to it later. (I have a workshop on using Google Maps for photos)
PROCESSING
Your workflow is important. No one should just leave their photos in their cameras or on their cards. After shooting your image files should be transferred to your hardrive and backed up. I am sure our project photographers are adept at this.
I recommend setting up a special folder for your project photos and copying them all in there. You might also want to categorize them into subfolders based on subject or maybe location. How you do this is up to you.
It’s a good idea to dump the clunkers. Get rid of anything that doesn’t move you. Most of us save way too many photos “just in case.”
Just keep your best shots. Chance are you will never miss the ones that don’t make the grade.
Few photos look their best right out ot the camera so you will want to do some processing. Your choice of software is up to you, of course. I use Lightroom to process my RAW files and Photoshop for fine tuning.
One thing I like about Lightroom is how easy it is to add metadata and to geotag your photos. Adding a few keywords to your photos helps a lot when they are being searched for in the future.
Another important function is geotagging, which embeds the coordinates of the location into the metadata. Some cameras can be set to do this when you take the photo. However it should be noted that these are the coordinates of the camera itself, not the coordinates of what the camera itself, not the coordinates of the subject being photographed.
If your camera doesn’t record coordinates or you want to correct them you can do this with Lightroom or by using a simple, free online website. Here is a video that shows how to geotag your photos. GEOTAGGING YOUR PHOTOS.
I also offer a suite of online workshops to help you sharpen your photography and software skills. Classes are held in the evenings on Zoom and last about an hour to an hour and a half. They also come with material that you can refer to after the workshop or if you sign up and then can’t make it.
The workshops on Composition and Light come with an eBook. The Lightroom and Photoshop workshops include a video. Here is the link to register:
ONLINE WORKSHOPS
SUBMISSION
Photos can be submitted anytime (as soon as the submission page is up!). We will want all the photos before Labor Day to enable the jury time to review them.
Submission is a two step process. First you submit your photos, up to four at a time. Upon submission you will be transferred to Chamber website where you will provide the submission fee. You can submit as often as you like.
Files should be a minimum of 3600 pixels along the longest edge. There is no requirement for the proportions. Photos can be 4×5, 2×3, square or some other proportion. Photos should be save at a quality of at least 10 so there is minimum compression.
THANK YOU
Finally, I want to thank everyone for signing on to do this project and to create a collective body of work. This will be a legacy and your photos will be viewed again for years.
This is also an opportunity for each of us to flex our photo muscles and build our own portfolios. Scenic images are always popular. They make great decor and are excellent gifts. They sell well at art shows and are good for contests.
Bill
Questions: Do we have to pay the $25 each time we submit 4 photos? Or is it a one time payment?
Thank you for organizing this project!
Lisa
We submit the $25 each time we submit photos.
I’ve come to realise how much work is involved in planning this project. I’m familiar with the larger Hunterdon County townships such as West Amwell and East Amwell that are close to Montgomery Township where I live. To minimise long driving distances on these small county and township road, I have tried mapping out bridges and historic buildings in the Amwells. However, I am frustrated in my efforts to find useful sources of information at the township level.
I have used the links provided in your post, but the information on the National Register of Historic Places and Bridge Hunter is not organised into townships. I have clicked on link after link, finding very interesting bridges only to discover that it’s an hour away.
For this project, the photography is the easy part.
Pingback: Isolation Photo Project, Day 120: Red Barn Milk Company by Khürt Williams on Island in the Net
Pingback: Isolation Photo Project, Day 126 by Khürt Williams on Island in the Net
Pingback: 52 Week Smartphone Challenge : Week 27 : Gratitude by Khürt Williams on Island in the Net